Engine Bay Detailing:
Myth busting bad engine cleaning tips
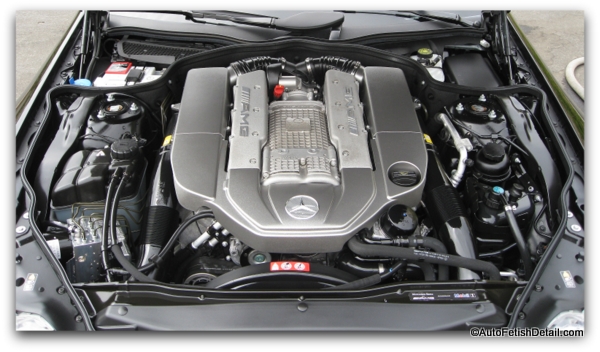
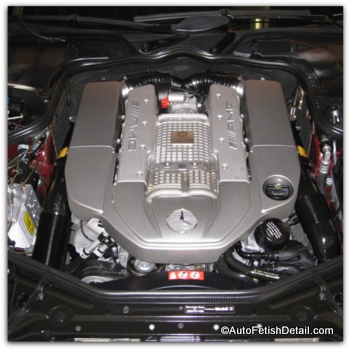
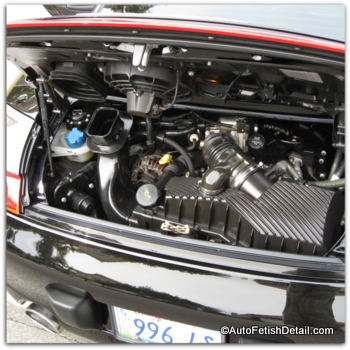
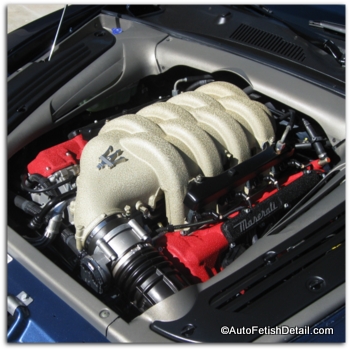
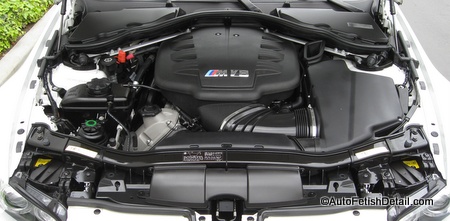
Engine bay detailing is the process of cleaning your car engine at a minimum, but can include detailing your car engine for a show car appearance.
While you may naturally find the act of taking an engine degreaser and water to your car engine a scary proposition, the real danger is more about the bad information that floats around continuously on the Internet from people with no real world experience.
Engine Bay Detailing:
Ignorance is cheap. Bad information is costly!
Likely you are familiar with the worn out adage of education versus ignorance:
"If you think education is expensive, try ignorance."
While this statement may be worn out, nonetheless it remains valid and meaningful.
Any search on the Internet for the best car engine detailing tips will deliver up plenty of free information on how to clean a car engine or how to detail your car engine from what may seem like an endless stream of websites and blogs.
Most of which are written by not only people with no real-world experience in cleaning a car engine, but actually have no business even writing about the subject in the first place.
The problem is a common one and detailing your car engine bay is no exception to this problem.
Engine Bay Detailing:
Bad tips from non-professionals
As a professional detailer with over 30+ years of experience it is easy for me to spot an article about auto detailing written by someone with little to no experience.
And the very next thing that is easily recognizable is the agenda of the website or blog I may find an article about engine bay detailling.
The problem is a common one and I see it on every topic of the detailing process. One website writer "copies" bad information from another inexperienced writer of another website and simply "tweaks" the information just enough to go unnoticed by a person with limited detailing experience.
Rinse and repeat. Rinse and repeat.
This problem continues to get worse and worse over time as more and more people and companies compete to sell their version of the detail products and in the case of cleaning your car engine, the best engine degreaser.
Engine Bay Detailing:
Myth busting
While I could overwhelm you with the countless examples of the bad engine detailing tips I come across, I am going to stick to the most common myths about cleaning your car engine, the best engine degreasers, and the steps of engine bay detailing.
Never use water on your car engine:
False! (is that clear enough for you as an answer?!)
The prospect of using water on your car engine and getting the many car engine components wet will likely scare the most you. I am going to do my best to calm your nerves by debunking the many myths and the bad information surrounding the subject of detailing a car engine.
The simple answer about as to whether using water to detail a car engine being safe or not is simple false. Especially on modern day engines that are so well protected, it would literally be hard to do any actual damage to your car engine getting it wet with a engine degreaser and water.
You have to cover all electrical components for protection:
False! (once again)
If you had the ability to have a car that was thirty-plus years or older (I use this number since cars this old have a very clear visual difference in the way they were built) and a modern day car you would clearly be able to see how the engine is protected and shrouded in many ways that would prevent any damage from engine degreasers and water.
Not only are the electrical connections extremely solid, but are extremely water tight.
The other so-called sensitive components (think alternator, fuse box, fuel injectors, engine pulleys, etc.) are made so differently and are so well insulated and protected from water and other liquids, you would have to maliciously sabotage a car engine with degreaser and water for you to damage your car engine in the process of cleaning and detailing a car engine.
You will crack your engine block if you get water on a hot engine:
Mostly false! (I say mostly for a few reasons)
I have yet to ever actually seen this happen even when someone poured or sprayed their hot engine with water.
In fact, you have probably watched someone overfill their radiator with water that spills out onto a very hot engine that has overheated. In an attempt to keep their engine from overheating more and to be able to continue to drive, they will be filling either the radiator itself, or the overfill bottle that connects to the engine. (this will largely be determined based on the age of the vehicle as most modern day cars have an overfill bottle reservoir that you fill with water/anti-freeze that circulates to keep your engine cool)
While I do not recommend attempting to perform engine bay detailing on a hot engine, it is not due to fear of you cracking your engine block (most engine blocks are not really exposed openly anyways so it would be difficult at best to even spray a hot engine block directly with water on most cars), it is due to your choice of the best engine degreaser flash-drying when you spray a hot engine.
In most cases, any chemical liquid will quit "working" once the chemical has dried and is rendered ineffective at that point.
And for this reason I recommend cleaning a car engine when it is cool to slightly warm (more on this in the actual steps of engine bay detailing below)
Engine Bay Detailing:
Professional steps to success
The actual steps to a clean and detailed car engine are very straightforward.
I will lay out the actual steps I do as a professional whether I am detailing a car engine for a customer or cleaning the car engine of my own cars.
- Start engine first to verify that the engine is operating properly (car engine's are complex machines made of many moving parts. A car engine also has an electrical system and fuel system. You simply never know when a problem with your car engine is going to happen under normal day to day conditions. If your car engine was going to act up initially that day, regardless of the day, your natural reaction if you did happen to clean and detail your car engine would be to blame the engine degreaser of water as the direct problem. This is especially wise if you are performing engine bay detailing for a friend of customer to verify that their car is operating as it should BEFORE you touch it)
- Only start engine and allow to run long enough to verify that the engine is operating properly (I recommend about 30 seconds of run time which is about the length of time for a cool engine to go from a cold-start, higher idle mode, down to a normal idle mode without the engine to becoming hot)
- Check surrounding areas under the hood for loose debris that has collected (tree/bush leaves, pine needles, tree droppings, misc. dry debris, etc.) These types of dry debris will collect typically towards the rear of the engine compartment just below the front windshield, but if you examine well enough, there are likely areas of the engine compartment and engine bay area where dry debris will also collect
- The dry debris can be removed by hand, blown out with a leaf blower (or compressed air) or even vacuumed out (the point is to remove dry debris first as it will be easier to remove when it is dry and will also not interfere with your engine degreaser getting to the dirty and oily parts of your car engine)
- Check the underside of your car hood to determine if you plan on cleaning this part of your engine bay. Also check the underside of your car engine before you go further with the engine bay detailing (every person is different. Engine bay detailing means different things to different people. You want to known before you go further what areas of the car engine bay you are dealing with as this will determine your course of action and the sequence of steps. Not properly assessing will mean repeating your steps by going out of efficient sequence of steps to realizing true professional results of detailing your car engine)
- Once you have determined all areas to be cleaned or detailed, you can now apply degreaser and hose off with water in proper sequence
- As a general operating rule of detailing, you start with the top areas first, then work your way down (this allows gravity to work for you, not against you)
- If you plan on degreasing/cleaning underneath the car hood, you will want to verify what you are dealing with since every car/truck will be unique (some vehicles will be exposed metal that is painted same color of vehicle, some vehicles will have an insulation mat or material attached to the underside of the engine hood. (you need to examine and determine how stable or delicate this insulation material is. The older the vehicle, the more degraded this insulation will have become. You may find it has already begun to sag or break apart. Only you can decide the approach you need to take if you plan on cleaning the underside of the car hood)
- If you plan on cleaning the underside of the car hood and it is metal, you will simply spray the underside with your choice in a degreaser. In most cases if the car hood insulation looks in good condition, a light application of degreaser is fine and recommended.
- Since you should be working on a slightly warm to cool engine, you should be able to spray under the hood, the engine itself, and the under-side of the engine completely without any drying of the degreaser happening (if you find the degraeser begins to dry as you are spraying all areas, simply re-apply so that all areas are covered with the engine degreaser and are remaining damp or wet before spraying with water)
- Gravity will work in your advantage as the degreaser will naturally begin to break down the dirt and oils and start to drip down onto the lower areas of your car engine and surrounding areas of your engine bay
- At this point you can use the recommend brushes I suggest below to break loose excessively dirty areas of your car engine (if you are dealing with an excessively dirty car engine, I recommend you spray these areas first, scrub to break loose heavy build-up of grease/oil, and then proceed to apply the engine degreaser to remaining areas of your car engine, underside of hood, and underside of the car engine. Even if you pre-treat the excessively dirty areas and the engine degreaser begins to dry, do not worry. Once you have pre-treated and scrubbed the overly dirty areas, you will reapply these areas with degreaser as you spray your entire engine. This will reactivate the original degreaser before you hose with water and you will be fine)
- My tip of efficiency of dispensing the degreaser is to use a garden pump sprayer (You might be surprised at how much engine degreaser you will use to completely cover your car engine while performing the engine bay detailing (using a garden pump sprayer like the one suggested below will allow you to mix up plenty of engine degreaser in advance and spray the entire are very quickly to avoid drying of degreaser before you have a chance to rinse it off. I cannot stress enough how this added tool will prove to be extremely helpful)
- Once you have complete coverage of all areas of your car engine and surrounding areas with degreaser and have pre-agitated any chosen areas of concern with brushes, it is time to rinse off
- I prefer a pressure washer as these use less water and rely on concentrated water tips that prove very effective (if you are using a pressure washer, simply be cautious of the amount of pressure coming out the tip of the wand. I use my hand at a distance to feel the amount of pressure coming out the tip. This allows me to determine how far I should keep the tip from engine components as I perform the rinse off stage of engine bay detailing
- I start the rinse off stage of engine bay detailing at the highest points once again allowing gravity to work with me, not against me (this means you would rinse the underside of the car hood first, allowing dirty rinse water to fall onto lower engine bay area and even further down onto the underside of your car engine and accompanying suspension parts)
- Simply work your way down as you perform a complete rinse of all components and areas you sprayed engine degreaser on. You can adjust the distance between your nozzle based on the sensitivity of the area or competent for complete rinse
- If you are using a garden hose to perform engine bay detailing, I highly recommend attaching an adjustable nozzle (I highly suggest the one below so you can adjust the spray pattern directly at the handle itself with your hand and make specific and immediate adjustments as you rinse your car engine)
- Once you feel satisfied with the results of degreasing your car engine and have done a thorough inspection (if you find areas still not sufficiently clean, simply repeat the steps until you have achieved desired results), it is now time to blow excess water from your entire car engine bay and underneath car hood prior to turning on your car engine (if you have a compressor, you can use compressed air. If not, I simply use a leaf blower to blow off standing water paying special attention to any area of your car engine you determine to be more sensitive. I am not looking to blow all engine components completely dry to touch, but blow away excess water or any standing water until I would call my engine 90% dry)
- Blow your entire engine (this includes the underside of your hood if you degreased that and actually start the blowing process with the underside of the hood first before moving to the rest of your engine) paying special attention to areas where water collects and the areas that pool-up with water, as well as any areas you determined to be more sensitive
- Time to start your engine and allow the engine to run long enough for the engine to raise to normal operating temperature (starting your engine and allowing it to run and heat up allows all the moving parts that have gotten wet to fully dry (this can be fan belts, pulleys, cooling fan, idler belt, timing belt, alternator, etc.)
- I also recommend you turn on the air conditioner inside your car to engage the A/C pump within the engine bay
- Once the engine has reached normal operating temperature (you can check your interior instrument gauge to determine this from inside the car) then you can shut engine off (it should take approximately 5-10 minutes of running time for your engine to reach normal operating temperature)
- Officially at this point you will have completed your engine bay detailing and cleaning and will now be staring at a very clean engine bay
- Now that you have started your engine and allowed it to hat up, and have also turned it off, the heat of your engine will fully dry all componenets of your engine bay to complete dryness
Engine Bay Detailing:
To dress or not to dress
At this point you will need to determine if you want to apply an engine dressing to your car engine. Dressing your car engine is mostly about the appearance, but it is not the only thing to consider.
Why You Would Want to Apply an Engine Dressing:
- It will make your engine literally "pop" as all the black hoses, black shrouding, belts, etc. will stand out in a good way (think of your tires with dressing versus without tire dressing)
- I am of the opinion that if you accept that a quality tire dressing is good for your tire sidewalls, then a dressing applied to your engine bay is also good for rubber and plastic components within your car engine bay
- Dressing your car engine as part of the engine bay detailing will truly make your car engine look better than the day it was brand new! I am of the opinion that when you have your car mechanically serviced, that a clean and detailed car engine is a clear and present indicator to the mechanic working on your car knows you take care of your car and it is like a direct message to the mechanic to treat your car with a higher degrees of concern and awareness. (Imagine the difference from a mechanics perspective of opening the hood of your car to service it: one car is covered with dirt and oil from thousands of miles of use, the other one is completely clean and detailed. Do you think the mechanic working on your car might treat the two different situations differently? I do...
Why You Would NOT Want to Apply an Engine Dressing:
- Any person opposed to applying an engine dressing as a rule typically claims that a dressing on your car engine "attracts" extra dirt and dust (which is generally considered unwanted by most people)
- While I accept why people maintain this opinion about dressing attracting additional dirt to your engine, I have a different opinion about whether this is fact or a myth: having dressing on your car engine does NOT automatically create this magnetic force that literally attracts additional dirt to your car engine. It simply is a false claim
- What does happen is a couple other things you should be aware of when performing engine bay detailing and deciding whether to dress your car engine or not: not all dressings are created equally. Some are filled with heavy solvents and silicones that remain tacky. These inferior dressings will allow any dirt that does find its way into your engine compartment to stick to your car engine more than having a car engine that has simply been cleaned, but not dressed.
- The other factor is a direct consequence of engine bay detailing and then dressing: if your engine is so clean and literally does "pop" with shine, what you have now created is a perfectly clean and shiny canvass that will show dirt MORE than normal. Because of this, I believe people equate this and formulate the opinion that dirt now is attracted to your car engine because of the dressing you have a applied.
Engine Bay Detailing:
Best Engine Degreaser
Finding a quality engine degreaser for your engine bay detailing cleaning is not a difficult find. You have plenty of options and I will lay out my recommendations for you
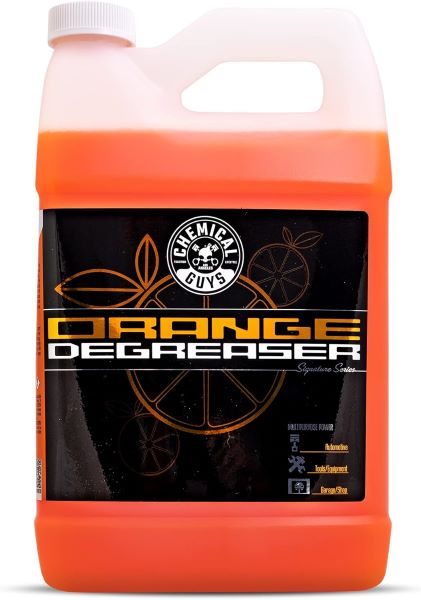
Chemical Guys Orange Degreaser on Amazon
- Very popular degreaser for driveway detailers to professional detailers
- Perfect for any engine bay detailing job
- Concentrate means you can custom blend based on your needs
- Economical concentrate so you can use full strength when needed, but dilute way down as needed
- You will go through a lot of degreaser when it comes time to spray down your entire engine bay, underside of hood, and lower engine when doing engine bay detailing (I am simply letting you know that if you think a traditional, single use size of engine degreaser will be sufficient, in most cases the 16 oz. or the 32 oz. size of ready to use degreaser simply will not be enough)
- Follow manufacturers labeling instructions as a starting point in determining the dilution ratio
- This degreaser is very versatile. So using it for only engine bay detailing is just a starting point as to the many uses of this particular degreaser
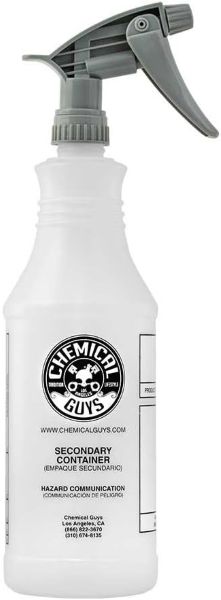
Chemical Guys Sprayer Bottle on Amazon
- A dedicated Chemical Guy's spray bottle and spray head for you to mix and dispense your Chemical Guy's degreaser with
- The exact sprayer head I use professionally
- Whenever possible, I prefer having dedicated sprayers for specific products like this degreaser ( I will be recommending an alternative to this sprayer below, but this sprayer is super convenient for not just applying the degreaser to your car engine when engine bay detailing and cleaning, but super convenient as you find more and more uses for this cleaner and find that a compact sprayer like this is very user friendly)
Engine Bay Detailing:
Engine Brushes
The dirt most of you will encounter in your engine bay detailing and cleaning will actually be rather superficial. Mostly a layer of oily residue that dirt has become attached to.
Most of you will not be trying to clean away heavy duty grease build-up, but lighter degreees of basic oil and dirt.
But with that said, your situation is unique to you and your world and I do recommend having at least one or two engine scrub brushes to help break loose any areas of your engine and specifically under the hood when doing your engine bay detailing.
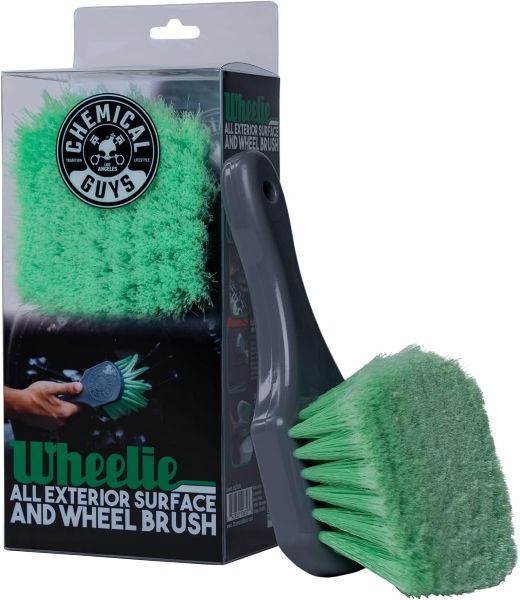
Chemical Guys Flagged Tip Brush on Amazon
- I prefer this brush for most of my detailing tasks due to what is called flagged-tip bristles
- This means the bristle tips have been cut so they are "feather-like" which makes for a gentler brush
- These brushes are ideal for engine bay detailing to break free dirt build-up on engine components and connectors that you will already want to naturally be cautious of
- This brush is particularly useful and effective for cleaning the underside of your dirty car hood if it is the bare painted metal type (the underside of car hoods will have cross member supports that will make cleaning more difficult without the use of a brush like this
- This brush is also useful if you have a padded insulator mat on the underside of your car hood as it will prove gentle enough to help break loose the dirt without being overly aggressive on the insulated mat
Engine Bay Detailing:
Darren's Professional Tips
Not only can you find an endless supply of bad information on the Internet from people with zero real-world experience, but engine bay detailing tips from people who will actually direct you in ways that will cause you problems!
It truly is a topic of auto detailing filled with an over-abundance of bad information that is continually repeated from one non-professional website to another.
I am going to list my additional tips I have collected from the real-world of professional detailing to help you avoid problems, and become more effective and efficient during the engine bay detailing and cleaning of your car engine:
- Your car runs and operates on a 12 volt electrical system. This is not the same electrical system you will find in your house or that you associate with the electricity that runs and operates your household appliances and outlets. While we have all been trained since we were children that water and electricity is not a good match, the electrical current running and operating in your car is completely different. You actually cannot be "shocked" by your cars electrical system like you can being shocked or electrocuted by the current in your house or power lines in your neighborhood.
- With that said, it is possible to do damage to your car if you were to cross the negative current wires with the positive current wires in your cars electrical system, but being electrocuted by your car is simply false. The closest thing to being electrocuted by your car that exists, is if you were to cross connect the positive terminal and the negative terminal of your car battery with a metal wrench or tool while holding it. This would heat up the metal wrench or tool and burn your hand. This is vastly different than being shocked by high voltage or amperage from your household electrical system.
- Many of the free "how to clean a car engine" tips and tutorials by the endless so-called experts of YouTube, websites, and forums circulating the Internet will instruct you to cover any electrical components and the car battery itself. Once again this is simply false information repeated over and over again as one bad so-called expert repeats and quotes another bad so-called expert. (a problem that becomes more and more pervasive as the Internet grows)
- Now that you know better: the car battery, the alternator, and other electrical connectors and components do NOT actually have to be covered by foil or plastic wrap of any kind.
- What we as society refer to as common sense (something being completely engineered out of humanity) is a welcomed factor at every facet of life; including engine bay detailing. This means that you should apply critical thinking, common sense, and logic regardless of the step of this engine cleaning process you are performing. This means you do not for example, use a pressure washer with the most concentrated tip and hold it at point blank range to ANY of your car engine components which would result in some form of damage to our car engine.
Engine Bay Detailing:
Engine Dressings
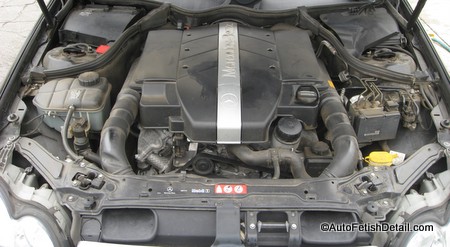
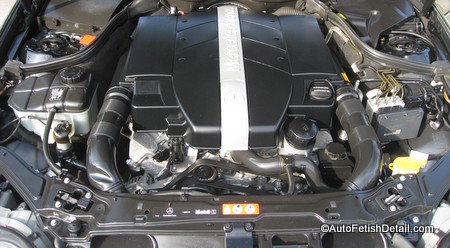
Both engine examples below were not only cleaned and degreased based on my detailed instructions, but were followed up with an application of dressing that clearly shows the "pop" factor when performing engine bay detailing.
To dress or not to dress; that is the question. Hopefully these car engine pictures will help you decide....
Mercedes Benz S-class Engine Bay Detailing:
Before and After
BMW 3-Series Engine Bay Detailing:
Before and After
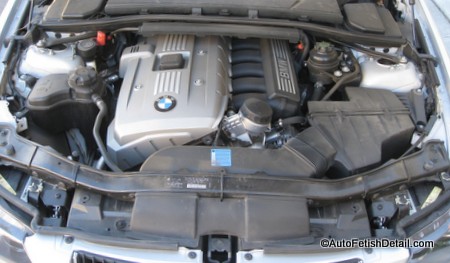
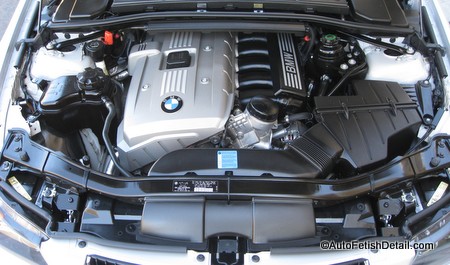
As you can see in the dramatic pictures above, cleaning your car engine is one thing, engine bay detailing by adding a coating of engine dressing brings things to a higher level of perfection and presentation!
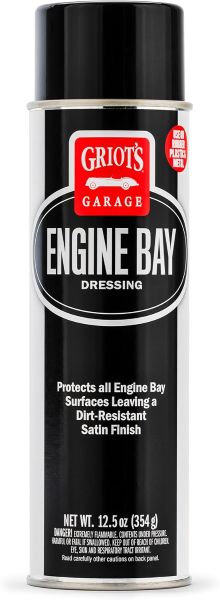
Griot's Garage Engine Dressing on Amazon
- Restores a Factory-Fresh Look: Revives dull or faded engine bay surfaces to a clean, like-new appearance.
- Protects and Preserves: Safe for all materials and finishes within the engine compartment. Helps prevent cracking, fading, and discoloration of plastic and rubber components over time.
- Keeps Future Cleaning Simple: Unlike greasy dressings, this formula dries to a smooth, non-tacky finish that won’t attract dust, grime, or debris.
- Fast and Effortless Application: The easy spray-on design lets you cover the entire engine bay in minutes—no oily residue, no mess.
- How to Apply: Clean surfaces thoroughly before use. Spray a light, even coat for a natural satin finish, or apply multiple layers for a richer, glossier shine depending on your preference.
Engine Bay Detailing:
Darren's Professional Extra's
Experience is king! Knowledge is good; experienced knowledge is better.
Within my career as a professional deailer, I have always been driven to engineer efficiencies into my business from the beginning. If time really is money, then efficiency always trumps inefficiency.
When it comes to spraying disturbing amounts of engine degreaser onto your car engine just to end up with a sparkling clean car engine, you will find out very quickly how inefficient a traditional hand-held spray trigger dispenser bottle can be.
Your hand (more specifically your forearm will begin to burn from over-use) will begin to fatigue very quickly as you try and dispense enough degreaser onto the entire area of your engine, under the hood, and bottom of your engine before the degreaser dries and ensuring complete coverage of your engine with the engine degreaser.
For this reason I cannot recommend enough the efficiency of using the following garden pump sprayer to mix your degreaser solution in, and use to easily and quickly spray your entire engine and surrounding areas in a fraction of the time it would take if you do choose to use a traditional spray bottle.
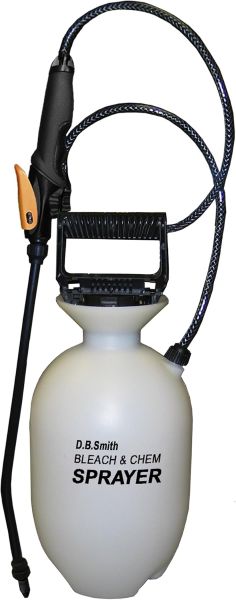
1 Gal. Chemical Sprayer on Amazon
- You could spend more on a sprayer like this; but you just don't have to over-think this moment
- Ideal for use when massive amounts of liquids have to be used (engine bay detailing, using car wheel cleaners, degreasers in general, etc.)
- My "go-to" pump sprayer for years
- Unlike other pump sprayers sold within the detail community, this one is more ideal in my opinion due to the extension wand that allows for easy access to spraying areas at a distance or spraying into tight areas
- Adjustable tip allows you to adjust spray pattern
Engine Bay Detailing:
Tips from the Non-Experts Club
Apologies! Sometimes I simply cannot help myself and must point out specifically some of the really bad auto detailing tutorials I find so frequently on the Internet.
To which I respond by adding the following links so you can verify yourself now that you have become more educated in engine bay detailing than most professional detailers I come across in my travels.
Darren's Links to Bad Advice:
Car and Driver: How ironic that one of the top car publications has an article on how to clan a car engine by a person who clearly has probably never even cleaned a car engine, but certainly has no business instructing ANYONE on how to do it properly and efficiently.
Meineke: Ironic again. One of the nations leading service and repair businesses offers some of the worst car engine cleaning tips I have ever heard. Not only following these tips will add unnecessary frustration to your world, but is severely lacking in enough information for you to feel even the slightest bit confident in engine bay detailing and cleaning.
Engine Bay Detailing Summary
How is that for being a resource for you?!
Not just a car cleaning tutorial, but a very comprehensive how to clean a car engine checklist you are not going to find anywhere else!
Whether you are looking for professional engine bay detailing, degreasing a car engine, to auto engine cleaning, I wish you much success using my real-world tips as a professional detailer!
Sincerely,
Darren Priest
|
|
