Professional Debadging Car Services
of Orange County
(714) 624-0804
NOTE: Sending me a text is the most immediate way to get a quote to debadge your car or truck. The following are the most useful sources of info I will need:
Removal Only:
- Year of your vehicle.
- Pictures of any and all emblems you want removed.
Removal and Installation:
- Year of vehicle.
- Pictures of any and all emblems I will be removing.
- Pictures of BOTH front and back of all new emblems I will be installing.
NOTES:
- When taking pictures of any new emblems, I want pictures of how the emblems come in their original template if this is the case. Do not disturb any backing tape/paper/template material.
- I always recommend OEM (original equipment) badges/emblems if you can get them.
- After market ones are acceptable and I can work with them, but experience has shown that in every case, OE emblems/badges are superior in overall quality and fitment.
- I accept that OE emblems are always more expensive—this is a choice only you can make since I do not sell, nor provide any new emblems/badges for replacement.
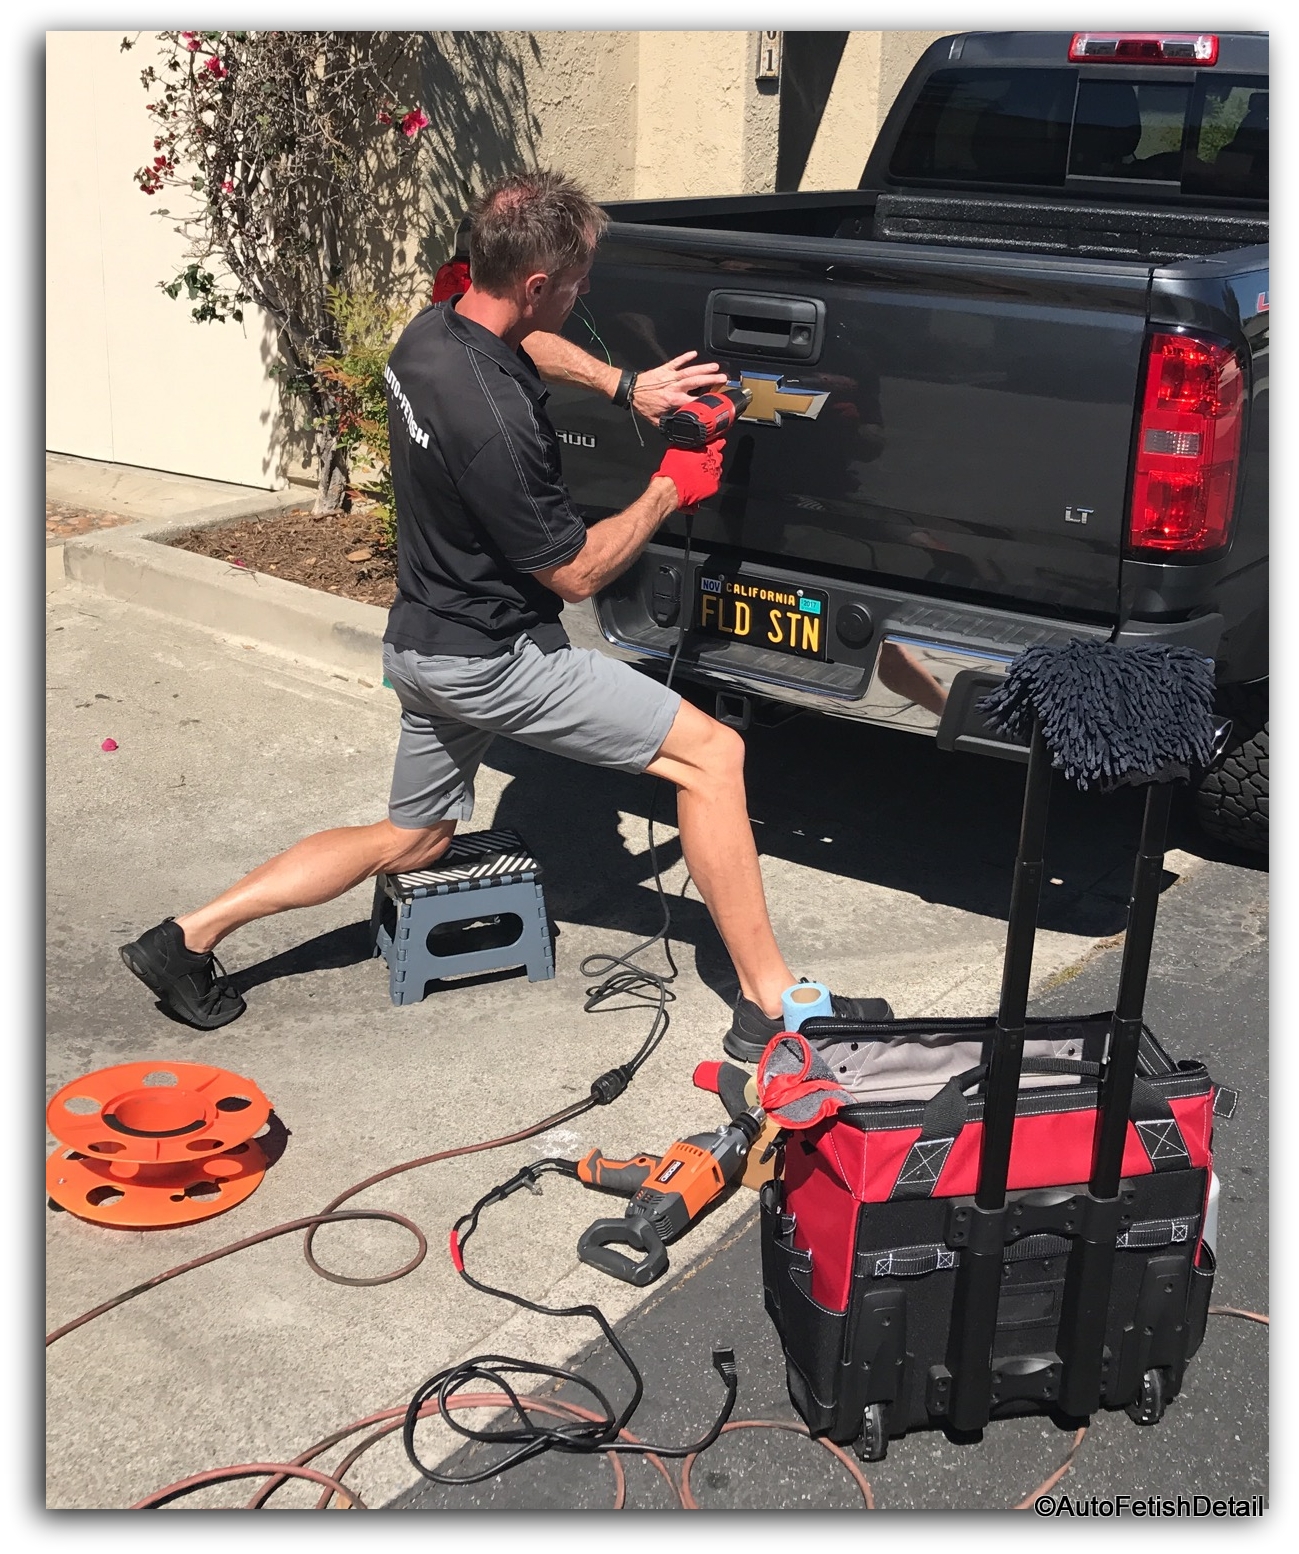 Darren as he professionally removes the emblems and badges from this Chevy truck
"Mistakes happen – they're the unforeseen risks of action. Debadging has these risks. Are you ready to own the outcome if you're the one to make a mistake?"
Many people (mostly guys) who decide to remove the car or truck emblems are generally the do-it-yourself type of guys.
The problem is that debadging your car or truck is a job that looks really very simple and straight forward at a casual observation.
My own videos on my YouTube channel make the process appear seamless and simple.
But for every step of the process —and there are many steps— there is an opportunity to really mess things up; be it a little scratch here, or a major paint blistering moment there.
Debadging Car and Emblem Removal Kit
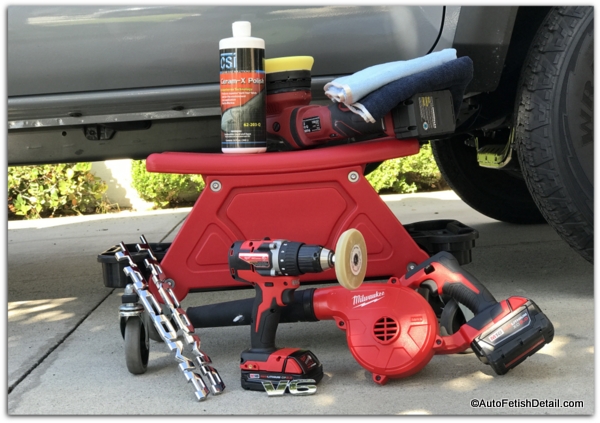
Above is my car debadging kit that includes much of the tools and products required to remove and/or replace car badges, emblems, and stickers from virtually any car, truck, or van.
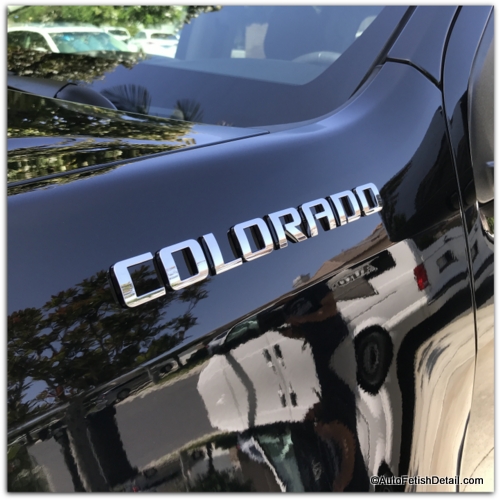
Debadging Car or Truck:
What You Need to Know
Every step of the way represents unique challenges you will not fully appreciate until you are actually attempting to remove these car badges and emblems yourself.
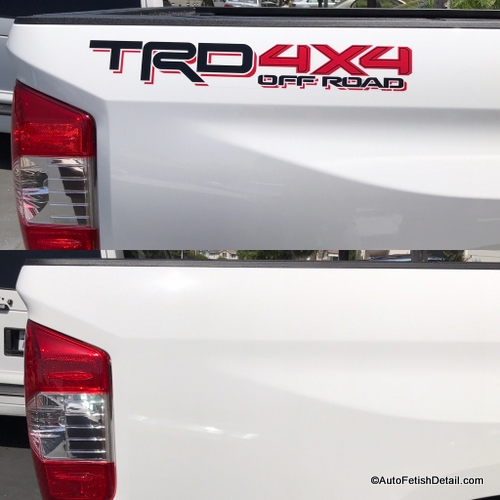
It is one thing to see someone with decades of experience do this in a video; entirely different when you are suddenly facing your brand new (or slightly used) car or truck with a certain tool, and you find yourself overcome with a healthy level of fear and uncertainty of due to your lack of experience.
"Darren, now that I see you doing this first hand right before my eyes, I am so glad I decided to pay you to do it. It looks so easy on the videos. Now that I see it first hand I can fully appreciate the skill and patience that goes into the debadging process!"
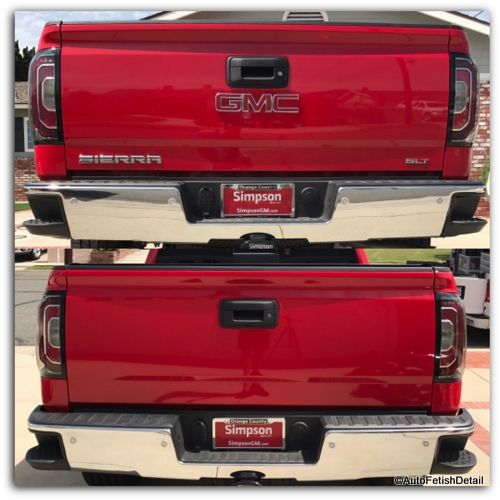 The GMC truck with emblems and badges removed for a "cleaner" look.
Debadging Car or Truck:
The Steps and Why They Matter
You may have already come to the wise conclusion to hire a person like myself to remove the badges from your car or truck.
In the event you are still on the fence, I have learned through decades of experience that most people truly don't understand each step and the potential for problems until they see it first hand.
Performing the debadging process countless times has given me a unique perspective: the ability to now communicate to you, the different points of view my own customers have shared with me.
The idea of doing this yourself is a very real and serious mental debate due to the potential consequences that are a reality.
1st Step: Heat gun to heat car emblem
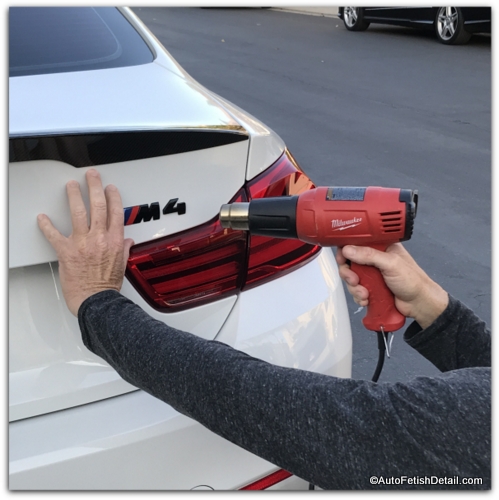
First step in debadging car is to heat car emblem to soften the double sided tape that secures car emblem to car.
Once you finesse the heat gun in heating up the car emblem without blistering the car paint, you can move onto step 2 of debadging car.
2nd Step: fishing line to remove car emblem
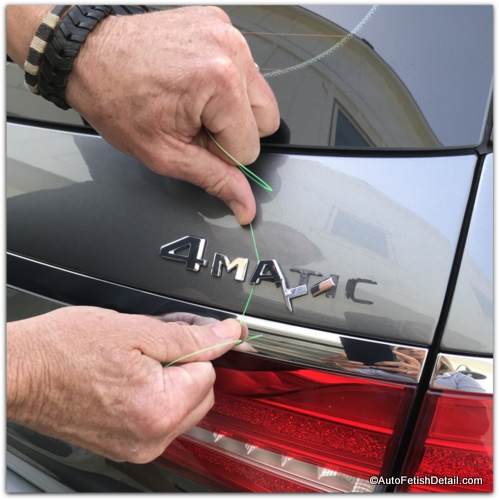
Fishing line is used to slice through the double side tape to release the car emblem from the car itself.
This part is pretty straightforward so long as you do not allow fishing line to abrade and scratch the paint surface as you slice though double sided tape.
3rd Step: eraser wheel to remove double sided tape
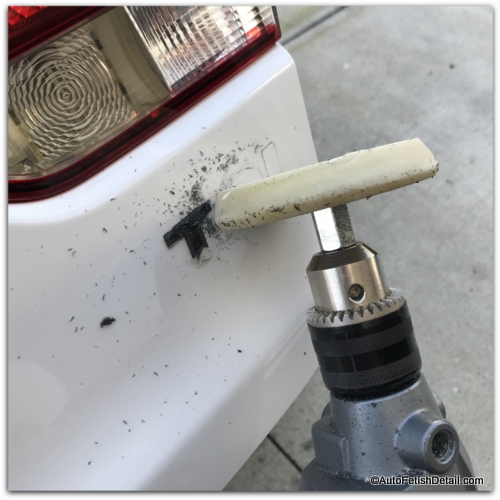
The 3M eraser wheel is an amazing tool that when used properly, allows the user to remove the double sided tape much easier than trying to remove by hand.
This eraser wheel is completely safe in most applications, but has certain limitations based on the car and the substrate material (metal body panel versus plastic body panel)
4th Step: removing residual adhesive
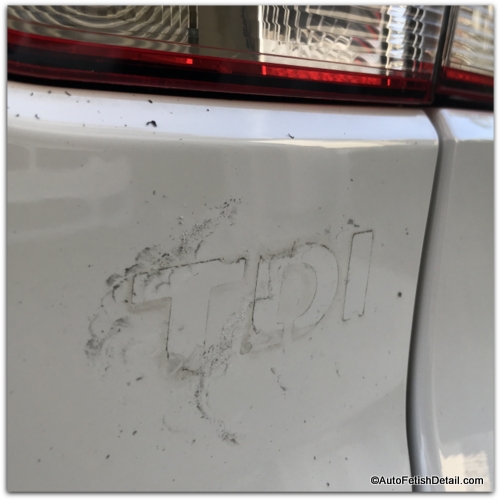
Once the eraser wheel is used to remove the double sided tape, there will always be residual adhesive that will need to be removed.
There are many products or chemicals that can be used to remove this adhesive, but not all products are safe for your car paint.
This step is often where people debadging a car themselves will abrade and damage the paint by not using the right product which then requires lots of rubbing which in turn abrades the paint.
5th Step: polishing car paint after debadging car emblem
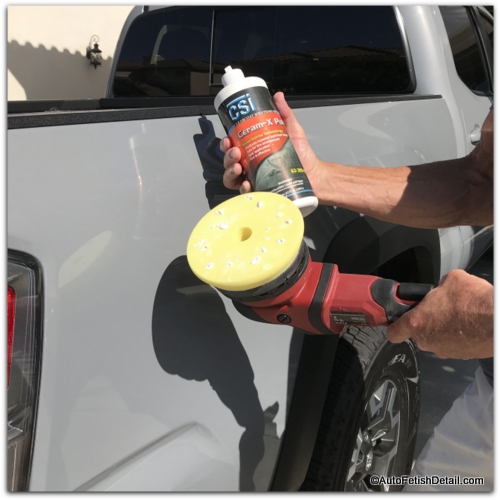
Not every car or truck needs to be polished after debadging car or truck. But for absolute perfection, polishing the areas where the car emblems have been removed is a requirement.
This is especially true on older cars and trucks, and cars and trucks with darker colored paint.
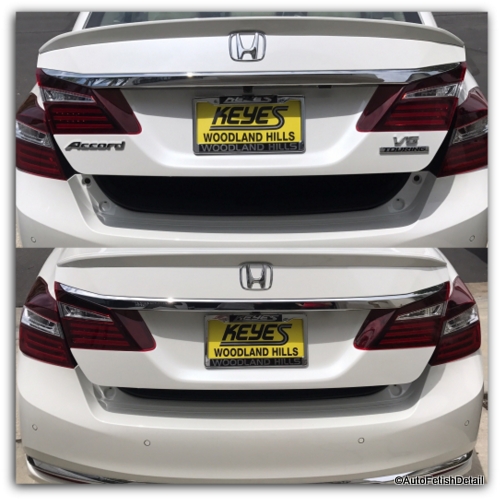 Debadging a Honda Accord for a "cleaner" appearance.
Why Do People Debadge Their Car or Truck?
"Due to my global following on YouTube and the many debadging car videos I have, many people want to know WHY!"
So let me answer that question in the event that you are simply investigating the process or contemplating having this done.
The Why's
- Many people prefer what is considered a "cleaner" look to their car or truck by removing the redundant car emblems and badges.
- Many people prefer not to have their car or truck be a rolling billboard with all the extraneous car emblems and badges.
- Once these emblems and badges have been removed, many people are now delighted by the fact that no longer are these extraneous emblems problematic in washing, cleaning, waxing, polishing, and detailing around.
- These myriad forms of car emblems collect dust and dirt underneath and around them that create an unwanted appearance.
- Allows a person to drive in covert mode. Meaning: by removing designating emblems, other people do not know which upgrade/downgrade model they are driving.
- Allows a person to be "unique" in that most people simply leaves these emblems in place. A very simple and often subtle way of customization to their car or truck.
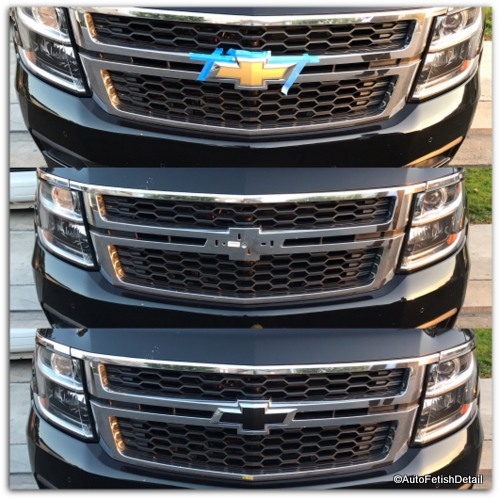 Replacing the yellow Chevy bowtie for a matching Chevy black bowtie and removing the extra "advertising".
Debadging Car:
Additional Points of Consideration
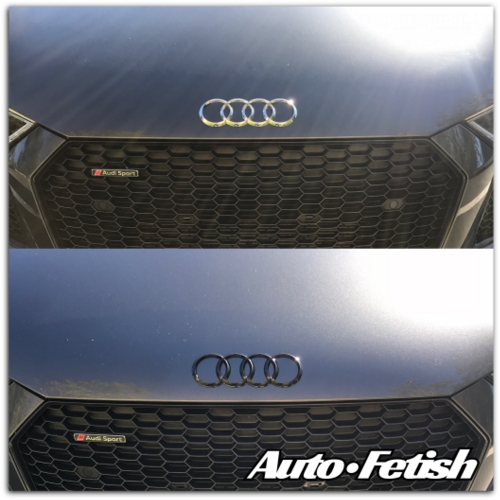
Use the following checklist to add additional information that you should or would like to know in advance.
- I have literally performed hundreds of these jobs. (see below for many examples)
- Many people travel to me to have this performed. (this will save you money if you come to me. I am in North Orange County)
- I am on a cash only basis. (And by cash I mean the green stuff)
- Every job is truly unique which means every job is unique in how long it takes, but with that said, most jobs range between 30-90 minutes from start to finish.
- The best way to schedule this is to text me your info: year of car/truck, how many total badges/emblems you want removed, the color of the car/truck I am working on. (my phone number is at the top of most pages)
- If your vehicle is older than 3 years, there is a possibility of a permanent "shadow" that will be left behind once the emblems have been removed. (This is a case by case and many variables affect this)
- Often people will seek out the "professionals" at your local car dealership to perform this service. Not to disparage car dealerships; but they suck in many cases. Not to self-promote, but I am simply speaking from experience as I have seen some of the worst mistakes come as a direct result of this blind faith so many people have in car dealerships. Debadging a car is not mechanics. Auto technicians are trained to do mechanical repairs, not body type repairs such as debadging cars or trucks.
- If your car or truck is older, and you are willing to chance having a shadow effect left behind, I am often required to wet sand the areas where I am removing the original car emblems. This is a result of years of dust/dirt accumulating around these emblems and wearing a pattern in the area that can only be diminished/removed through wet sanding and polishing. This is another variable that will effect cost. (this is always a case by case judgement call you and I can make together)
- If you are wanting to replace your old emblems with new one's; as a rule I recommend getting original equipment (OE) emblems from the dealership. I have seen numerous after market versions and so far every aftermarket version has proven to be inferior to that of OEM. (who would have thought?)
- As a rule, the manufacturers logo (Mercedes, Ford, etc) will have pins that go through the sheet metal of your car. I have seen exceptions, but that is the rule. Chevy bowties and GMC emblems seem to be one of the few exceptions.(The best way to verify in advance is call the parts dept. of your local car dealership and ask them to look on their computer screen for a replacement emblem to see if it shows pins sticking out from the back of the emblem)
- I have never actually made ANY mistakes performing these jobs. With that said I can't control factory paint blemishes that may in fact lay in hiding underneath these emblems. These cases are extremely rare, but do remain as a possibility.
- I have had a couple cases where someone else had previously tried to remove the emblems and have "messed up". So the emblems were put back in place to cover the damaged paint. This has only happened on cars/trucks where the owner was not the original owner and had no ability to know in advance....just as I won't until the rude awakening is staring us in the face as I remove the emblems. Obviously I can't control this but you need to be aware of the potential in the event you are not the original owner.
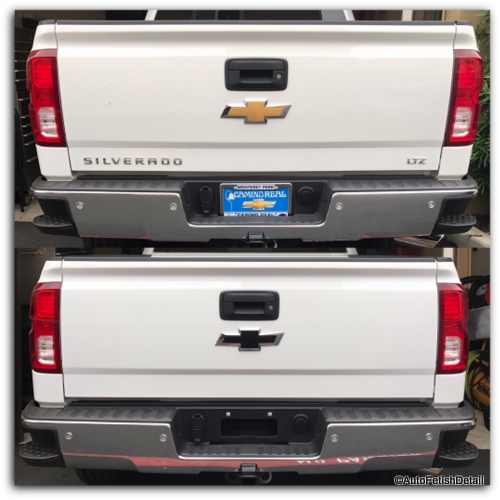 Removing and replacing the Chevy Bowties, along with removing remaining truck badges.
Pricing:
Debadging Cars/Trucks
Trying to lay out every conceivable removal and replacement debadging job would be impossible due to the numerous factors that will ultimately determine the cost.
I have done my best to lay out the many nuances of this process so that you will be as fully informed as possible.
With that said, despite all these many nuances of debadging cars and trucks, every car/truck owner is different and have unique requests. Which means that ultimately, every job will be unique in actual cost to have done what you want done.
So with that said, I will make some broad generalizations so you at least have some context as to what to expect.
Virtually every job has fallen between $80-$350.00. (perhaps your unique situation will fall on either side of those numbers; there is always a first) I realize this is a massive spread in cost, but there is a massive spread in the countless jobs I have done along with the countless requests of the individual car/truck owners. Literally, anything goes. Seriously....
Before and After
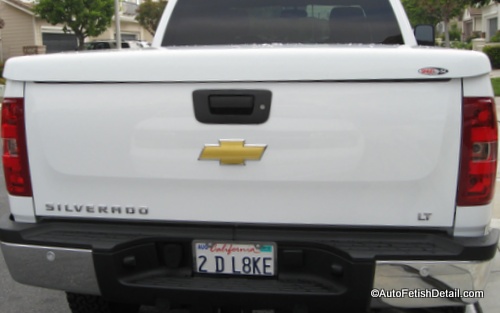
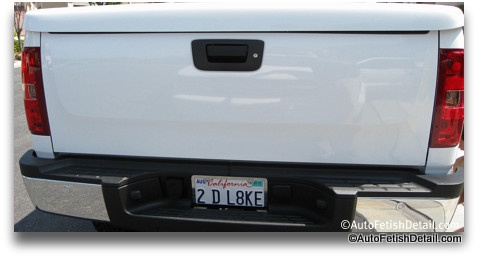
Car Emblem Removal: Chevy Silverado
Notice how the back end of this Chevy Silverado truck has a new, cleaner appearance after the car emblems and badges have been removed.
Debadging Car Summary
I hope you have new understanding of the debadging car or truck process. It is a topic that is often misrepresented through many videos that can be found on YouTube, as a well as a topic filled with erroneous information.
Bad information being repeated from one well intentioned person after another. Now that you have more understanding, I hope you can also make better decisions when and if it comes to the debadging car or truck moment of decision in your world!
Sincerely,
Darren Priest
- Home
- Debadging/Wraps
- This Page
- This Page
|
|

